

Hot Sewing & Embroidery How-Tos


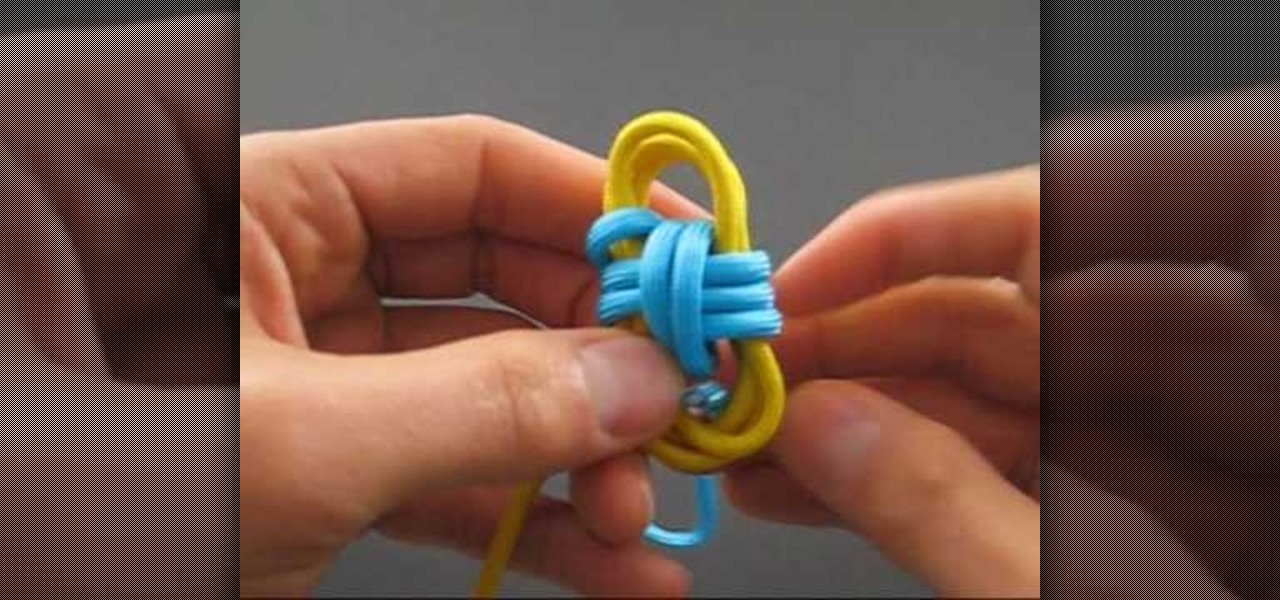
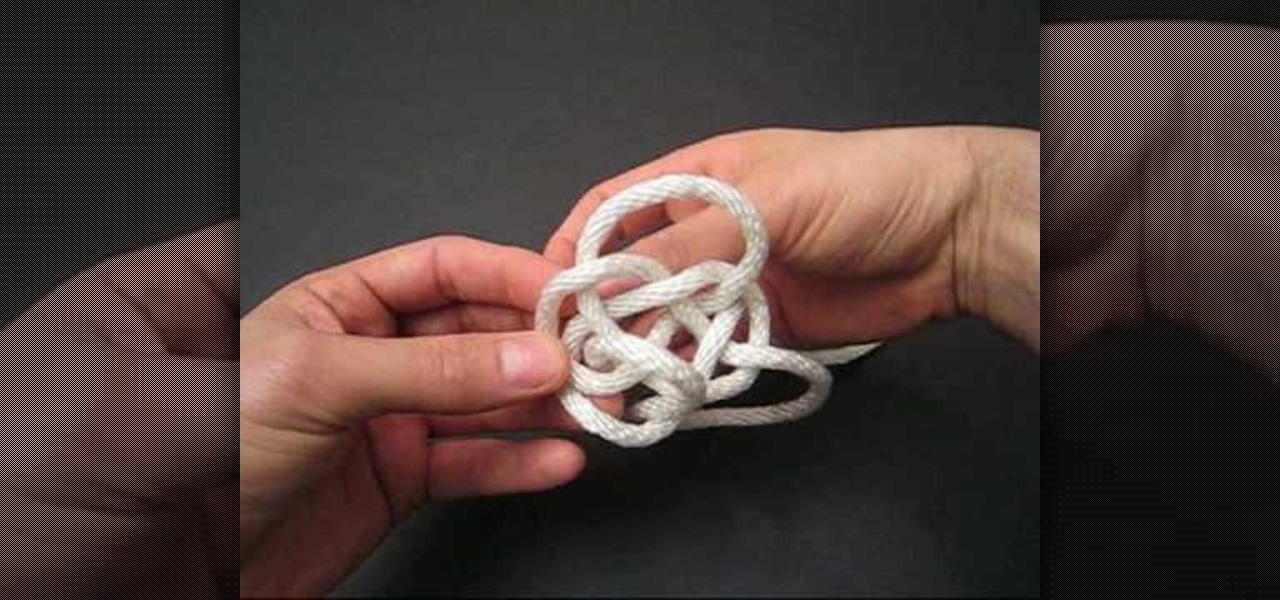
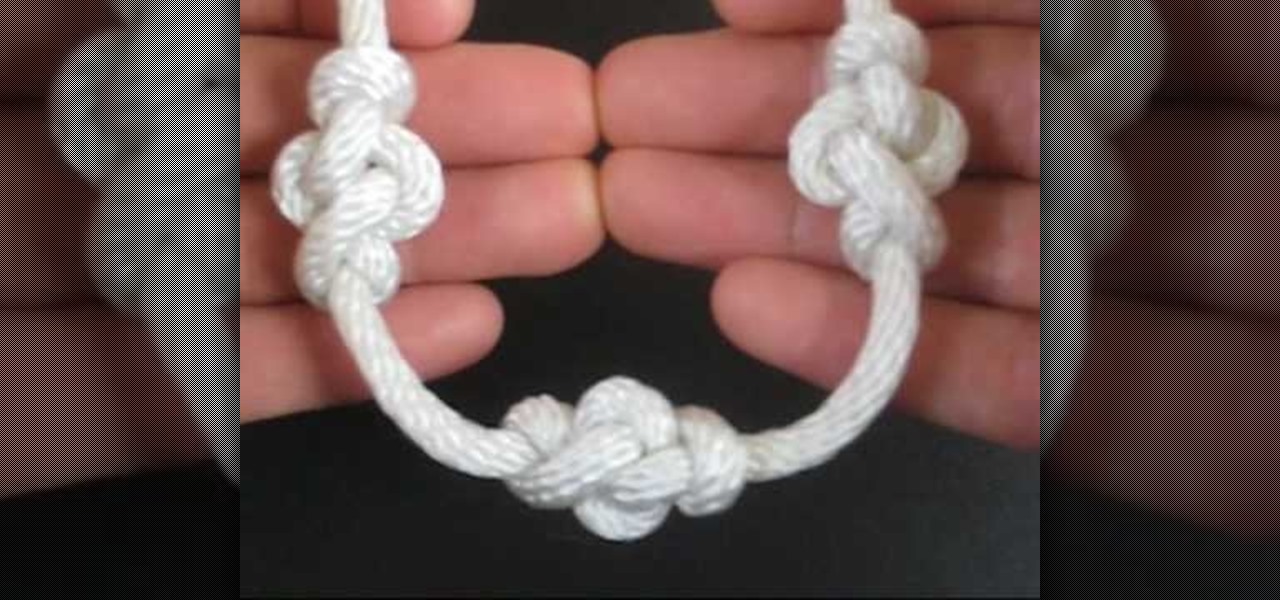
How To: Tie the two color monkey's fist knot
In this tutorial, we learn how to tie the two color monkey's fist knot. First, make a double overhand knot, and snip the edges off. Next, create the monkey's fist by taking one of the ropes and looping it around the fingers several times. After you do this, push the knot through the fingers and tie the other string around the entire loop several times. Push the string through the loop, then continue to tie on the opposite side around itself. To finish this up, Pull the two outside strings tog...
How To: Tie the Rising Sun decorative knot
In this tutorial, we learn how to tie the rising sun decorative knot. First, loop your string on the left side, then pull the right side over the top. Now, bring the bottom of the right side over and place the end into the first loop going over the other string. Next, remove the string from the last loop it was in, then bring the right over to the right loop and push through to the bottom. Next, bring the right string over to the left side and thread through the left loop closest to it. Next,...
How To: Tie a plafond (lanyard) knot
In this video, we learn how to tie a plafond knot. First, make a loop with your string, then make a smaller one directly underneath it. Make a larger loop underneath this, followed by another small one. After this, grab the bottom and lift it to the middle of the one on top of it. Next, bring the top down and push it into the middle of the bottom loop. Bring the left hand side of string through the top of the loop, followed by the right hand side through the right hand side middle. Now, pull ...
How To: Tie a Paracord Snake Knot
In this tutorial, we learn how to tie a paracord snake knot. Start out with a double overhand knot, by making a loop with two strings and tying it through. After this, start the snake knot by taking the left piece of string and wrapping it around into a loop. Then, take the other piece of string and place it inside the loop, then pull it to the left and wrap it around the other string, then push it through the loop. Continue to do the snake knot until you reach the bottom, then finish it off ...
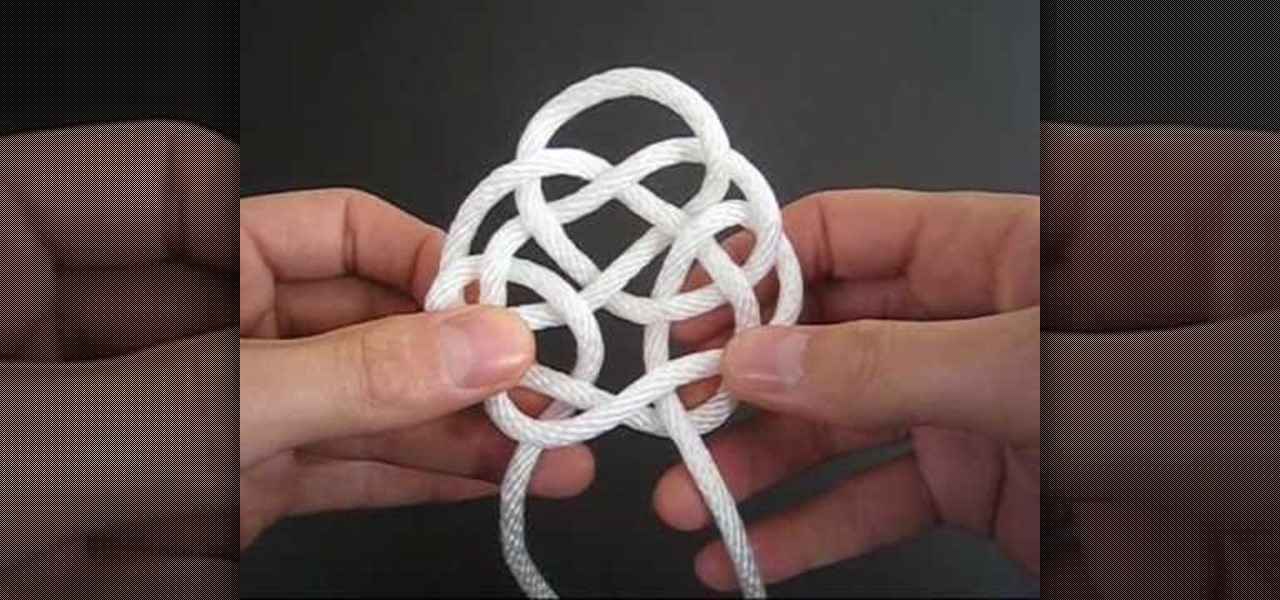
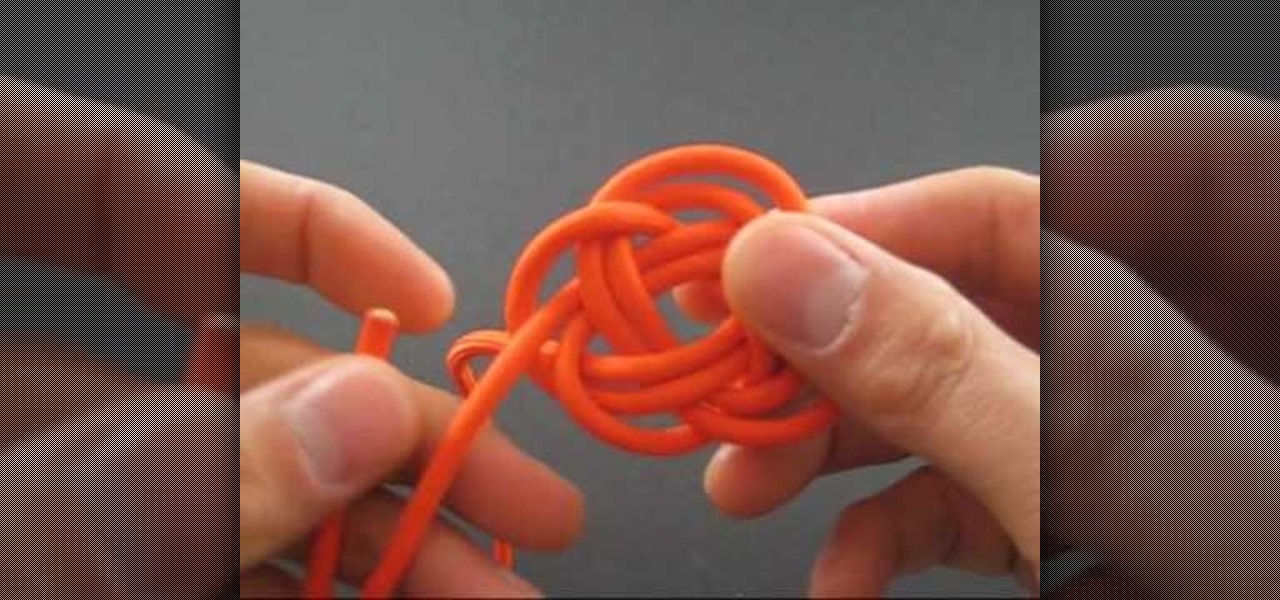
How To: Tie a Cloud knot
In this video, we learn how to tie a cloud knot. Start by making a loop in the middle of the string on the left side, then wrapping the right side around it and pushing it through the middle. Next, do the under-over weaving technique by bringing the string over one loop and weaving it into another. Continue to do this several times until you have done about four or five weaves. After this, pull the sides of the string out on both sides and you will have your finished knot! Pull tighter to hav...
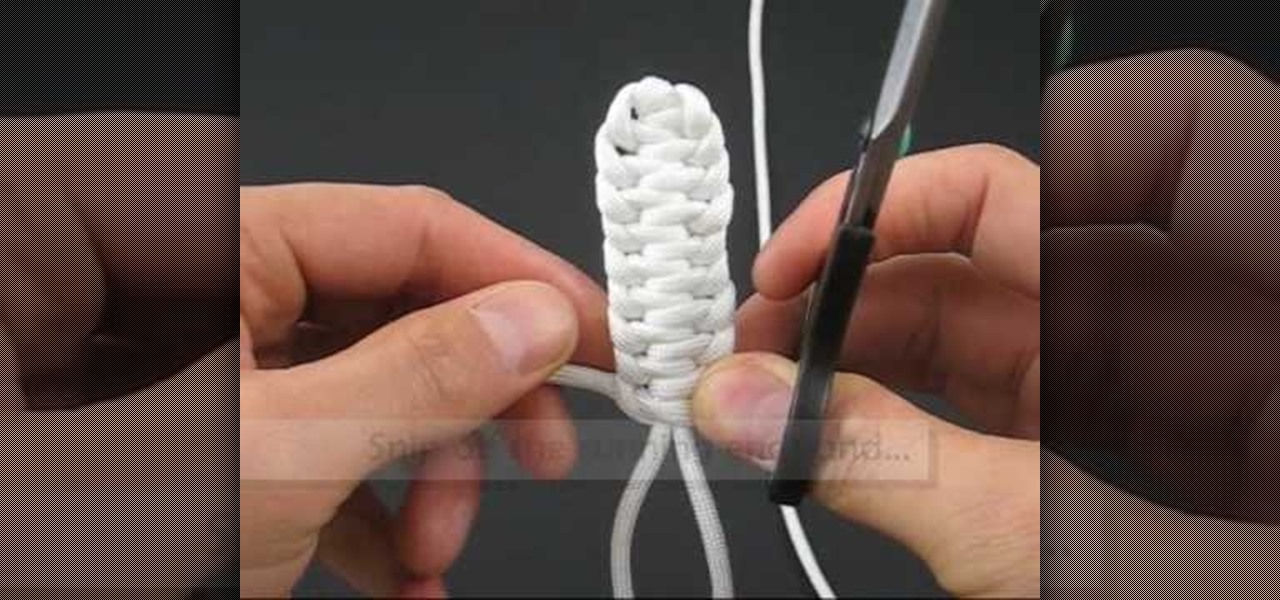
How To: Tie paracord knot balls
Have more paracord than you know what to do with? If so, and if you're interested in storing it in a creative, esthetically-pleasing fashion (that is completely without any sort of material utility) then the paracord knot balls outlined in this video are for you! Tie some with this free video lesson.
How To: Sew elastic (polybraid & Lastin)
This video is a tutorial on sewing both polybraid elastic and lastin elastic. Polybraid is a very sturdy fabric elastic, while lastin is a thin, clear, very stretchy elastic, good for use in diapers. It is important to buy name brand lastin elastic to ensure good quality.

How To: Make a homemade hoodie out of an old t-shirt
This video tutorial in Arts & Crafts category will show you how to make a homemade hoodie out of an old t-shirt. Katia is presenting this video. First you cut out a T-shirt shape out of an old newspaper. You can do it freehand also. For the front piece, take the neckline down a little bit. Then draw a hood shape. To draw the neckline of the hood watch the video. So, you now have the back, front and the hood pattern pieces. Now take your t-shirt and cut it open from the side. Place the back an...
How To: Tie a single-strand Ringbolt hitch knot
In this video, JD, from Tying It All Together, demonstrates how to tie a knot known as a "Ringbolt Hitch". This is also known as "coxcombing". This type of knot was once a common tie used by sailors to dress-up items and parts of their ships. When tying a wheel, a "Turk's Head" knot was used to cover the part of the wheel where the two ends of the ring bolt met, which would firm up the hitch, and help to keep the tied ends from unraveling. It is a nautical tradition to use this type of knot t...
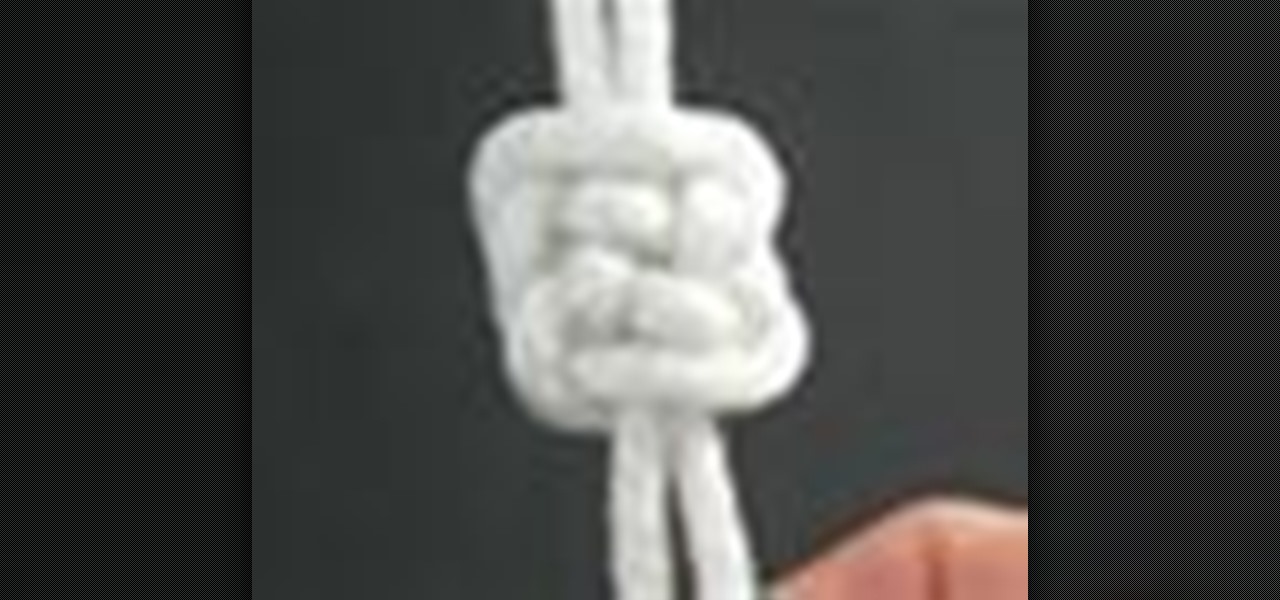
How To: Tie the Eternity knot to decorate a rope or string
In this video the host of "Tying It All Together" demonstrates how to create a "Eternity Knot". This type of knot is an attractive way to decorate a rope or string. Strung along one after another on a rope or string, it creates elongated bead-like knots at intervals of your choosing. The Eternity Knot is named for it's resemblance to the symbol of Buddha's all-knowing wisdom and the uncommon quality of his realizations. In this video the host will lead you through the entire process of creati...
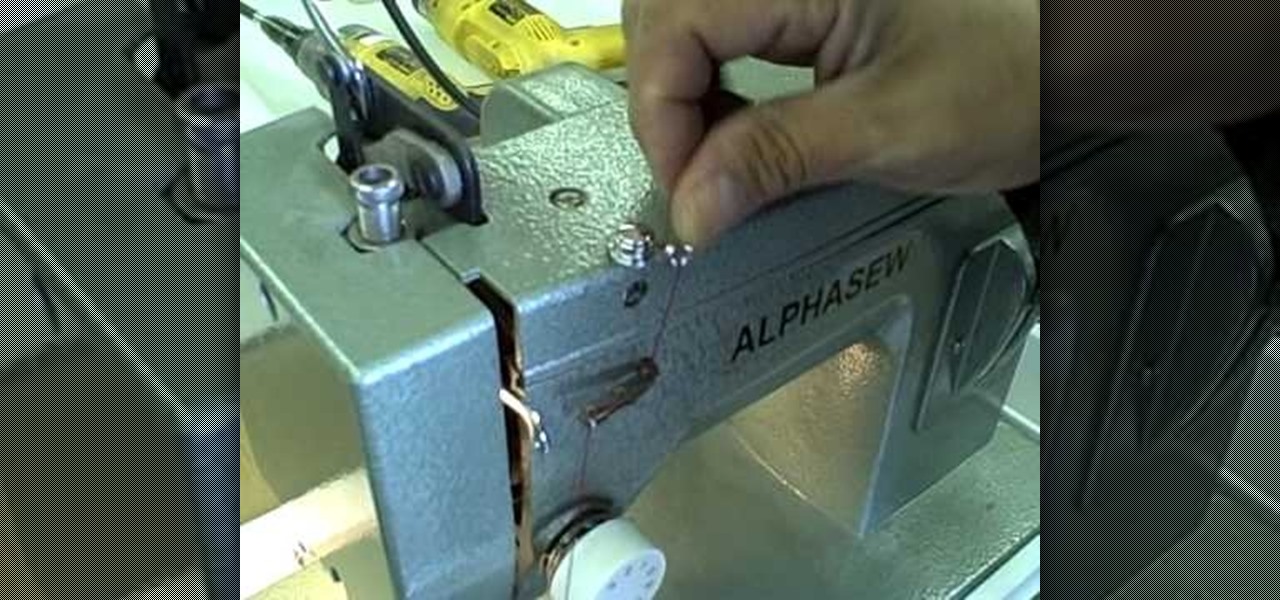
How To: Thread a sewing machine step by step
This video shows us how to thread a sewing machine step by step. To thread a sewing machine: Place the presser foot in the upward position. Place a spool of thread on the spool holder. Traveling from the spool holder, across the top of the machine, look for a minimum of one thread guide. Insert the thread in the thread guide(s). Now look for a tension mechanism. Bring the thread downward to the tension mechanism, slip the thread between the metal disks of the tension mechanism, and travel bac...
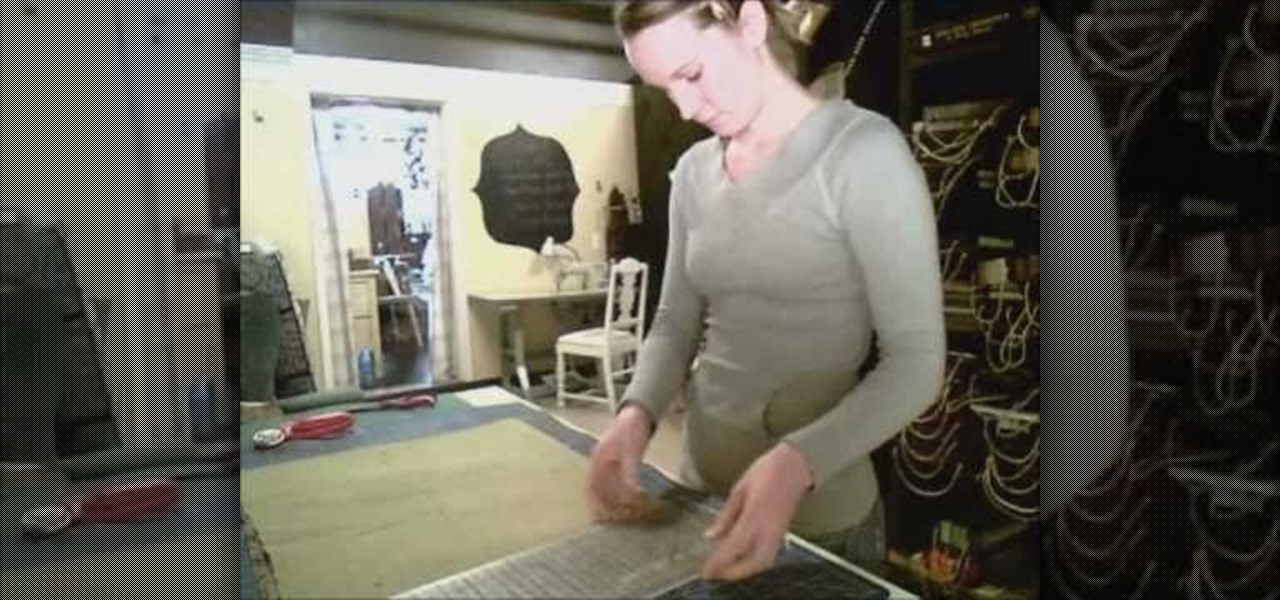
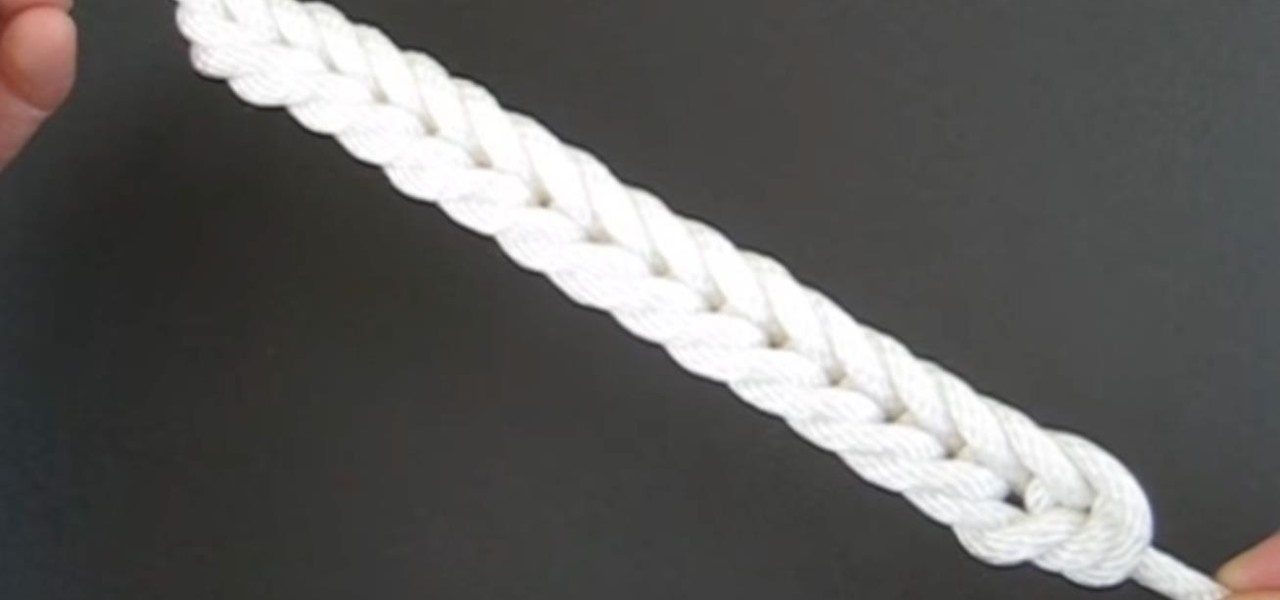
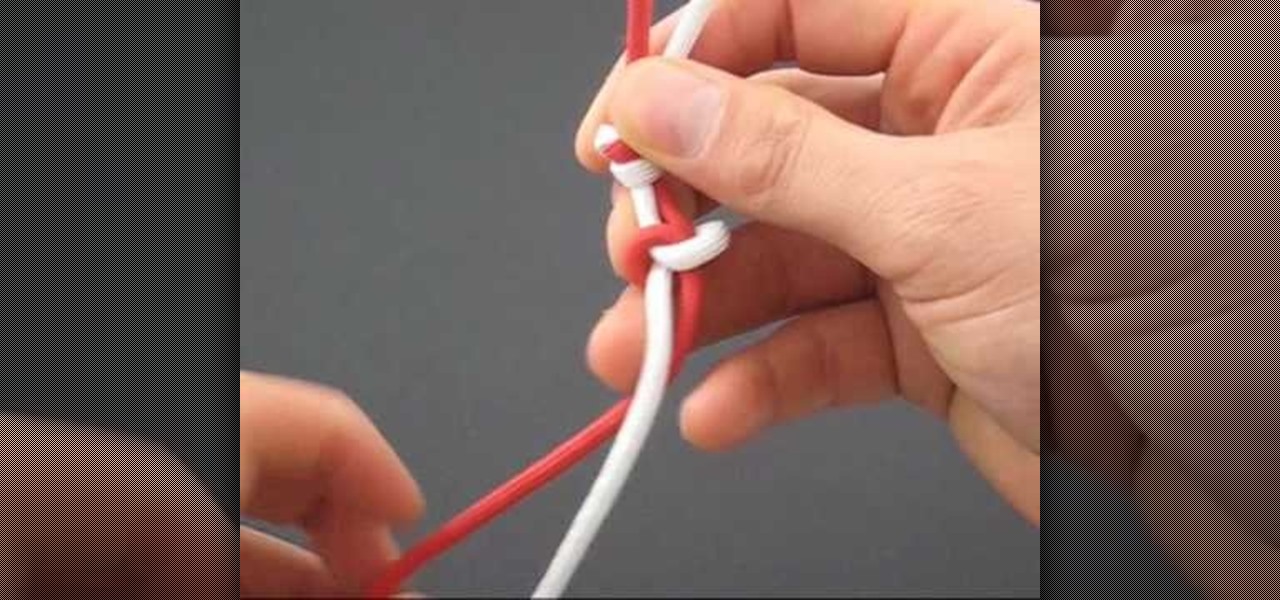
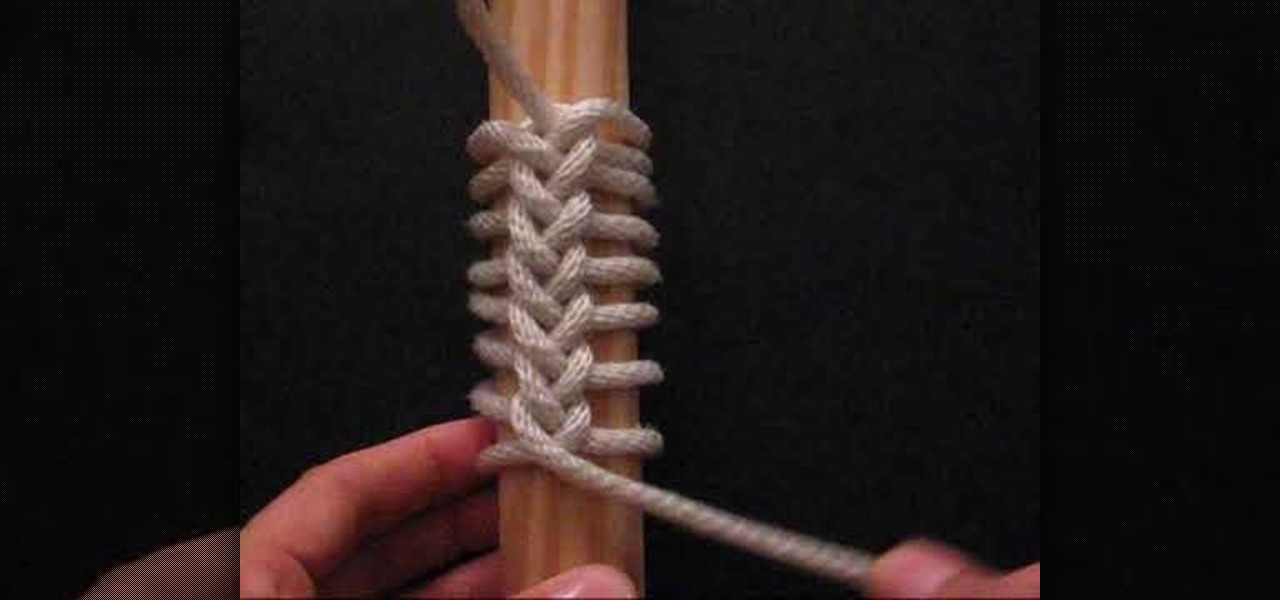
How To: Tie single Genoese knot bars
This video describes the technique used to tie a single Genoese bar knot. The presenter shows what the completed knot looks like, and then shows the technique used to tie the knot. The process for tying this knot is similar to braiding as the ends of the string are looped around and through the previous section. Each segment must be pulled very tight or the knot will fail to reach the correct shape. The hitches continue until the desired length of the knot is reached at which point the excess...

How To: Tie a River knot
This video from Tying It All Together demonstrates how to tie a river knot. Holding the rope in your left hand, make a loop to the right and bring the rope down so it lies over the loop. Bring it up behind and pull it through the loop. This makes a loose knot with three overlapping loops. Make another loop on the right and pull the end through the lower part of the right loop. Then make another loop on the left and pull it through the lower part of the left loop. Take the rope from the left s...
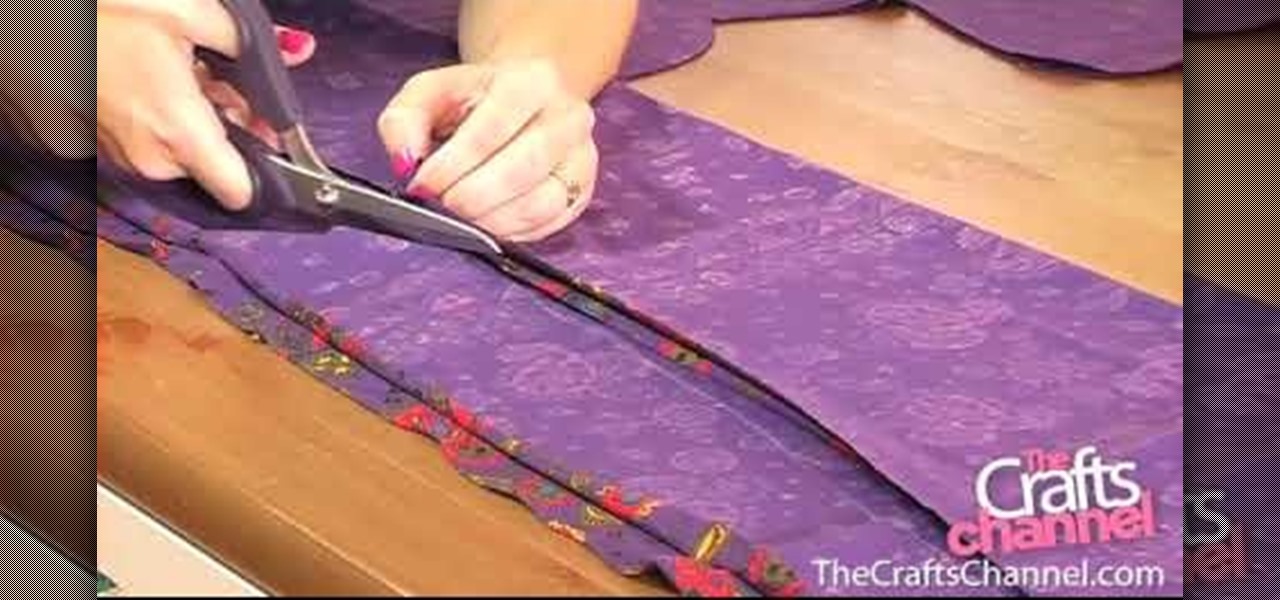
How To: Use bent handled trimmers
Learn how to use bent handled trimmers: Kenneth D. King of ThreadBanger Quickies and NextNewNetworks explain how to use bent handled trimmers for working with fabric projects. Bent handled trimmers are great for cutting out fabric patterns and designs. The scissor itself slides along the smooth plane of the cutting table and it lifts the fabric just enough to successfully cut the pattern out. Bent handled trimmers make a very accurate cut. Never ever use your fabric scissors for cutting paper.
How To: Create your own gorgeous no-pattern shift dress
1: Chose a stretchy fabric & fold in half, so that the right side of the patterns are together. 2: Lay dress on top of fabric & trace the dress with dressmakers chalk, allowing for a 1.5 cm seam allowance (except for the bottom. allow 5 cm).

How To: Thread a Brother sewing machine
Thread cassettes on a sewing machine allow you to advance prepare desired threads. This how-to video provides a video guide for using a Brother sewing machine, how to read indicator lights, and how to set the machine up for sewing. Watch this video sewing tutorial and learn how to thread the cassette on a Brother sewing machine.
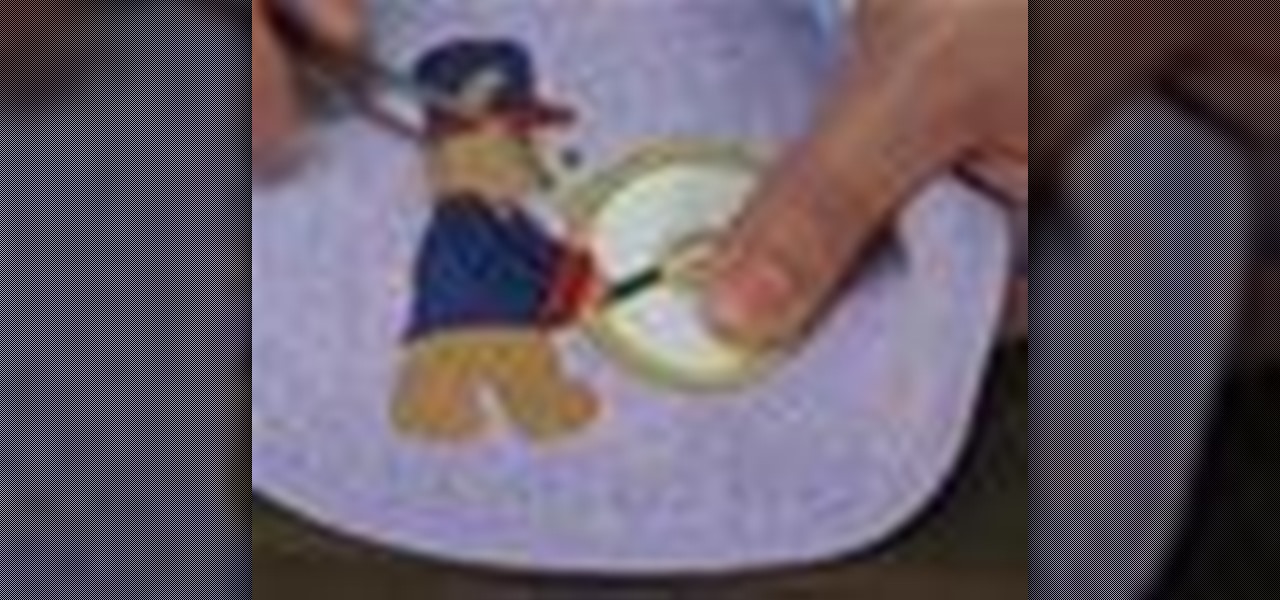
How To: Use puff foam for embroidery projects
Puff foam adds an outstanding element to your embroidery design, and help you 'stand out' in the crowd. Great for embroidering tote bags, sweatshirts, baby bibs, and much more. This embroidery instructional video will take you through all the necessary steps. Start embroidering!

How To: Sew universal tempo tape onto a drapery panel
Create softly folded drapery panels with our universal tempo pleat tape. It's the perfect subtle look for flat panel drapes. Learn step by step how to sew on our universal tempo pleat tape to create soft folds by watching this video sewing tutorial series.
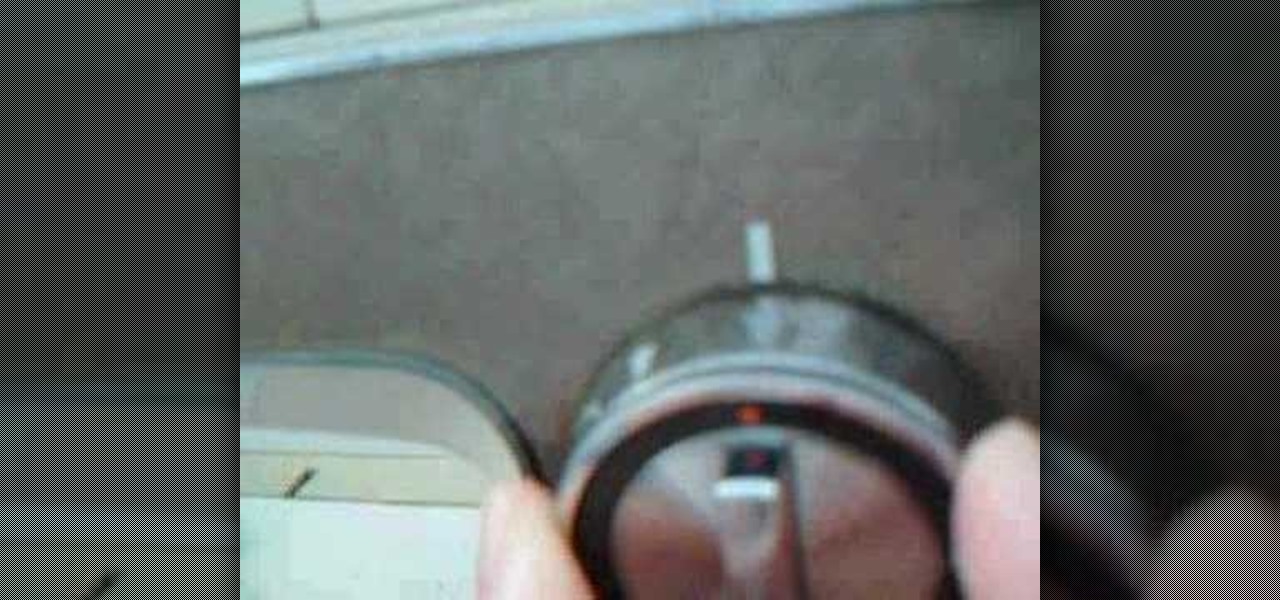
How To: Use the tension knob on a Kenmore sewing machine
Using a sewing machine entails knowing how to the tension knob properly. This sewing how-to video demonstrates how to properly adjust the tension knob on a vintage Kenmore sewing machine. The tension knob is located near the front of the sewing machine. It has a dial numbered from 1 to 9. The larger the number, the tighter the tension.

How To: Braid thread or yarn
This quick video tutorial demonstrates how to braid using three strands. Braided chains make great embellishment or decoration on sewing or knitting projects. Learn how to braid thread or yarn by watching this instructional video.

How To: Make a tube scarf
Once you know the difference between knit & woven fabrics, you can make the easiest project on the planet: a lightweight, trendy tube scarf. Melissa shows you how to wear it and how to make it with this how to video. Watch this sewing tutorial and you will be sporting a new tube scarf in no time.

How To: Thread a mechanical Singer sewing machine
The machine used in this video demonstration is a 3343c, but the threading is exactly the same as on a vintage Singer and other modern models. Learn how to thread the needle on a mechanical Singer sewing machine by watching this video sewing tutorial.

How To: Do the ribbon and padded ribbon stitch for embroidery
This video tutorial shows how to do the Ribbon Stitch or Japanese Ribbon Stitch and the padded Ribbon Stitch. Learn how to sew these simple embroidery moves by watching this instructional ribbon embroidery video.
How To: Crush velvet
This crushing process brings out color variations by flattening the pile or nap of the velvet, and adds surface texture by pleating the fabric. One benefit to this method is that a simple wash and tumble dry will restore the fabric to its original condition, so watch this video and see just how to create crushed velvet.
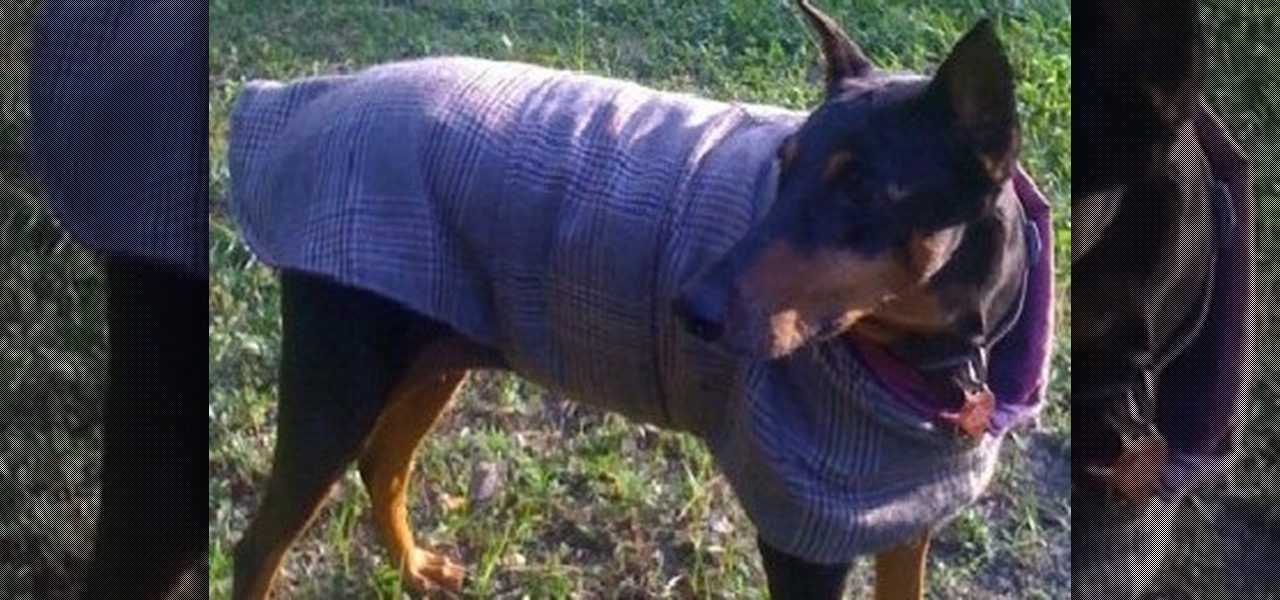
How To: Make a Tailored Coat for Your Pet
As the cooler weather starts rolling in your pet will need more than just his natural coat to keep the shivers away. Take him out in style by designing a simple yet elegant tailored coat that will fit him perfectly. Here is an easy lined tailored coat with a nice thick comfort strap to keep him snug. Watch this video and follow the accompanying written instructions.
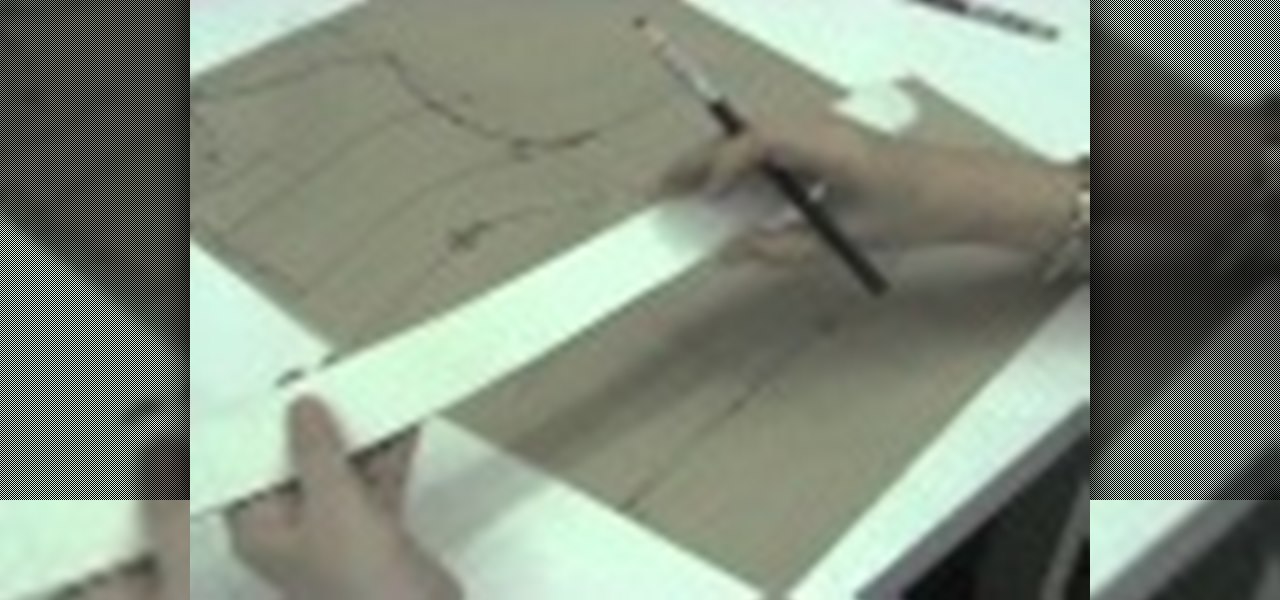
How To: Draft a Pattern for Baby Shoes
Here is a simple way of how to draft and create your own pattern for mary jane baby shoes. It is simple and can be done in under 30 minutes. The Stitching Scientist: How to create your own pattern for baby shoes
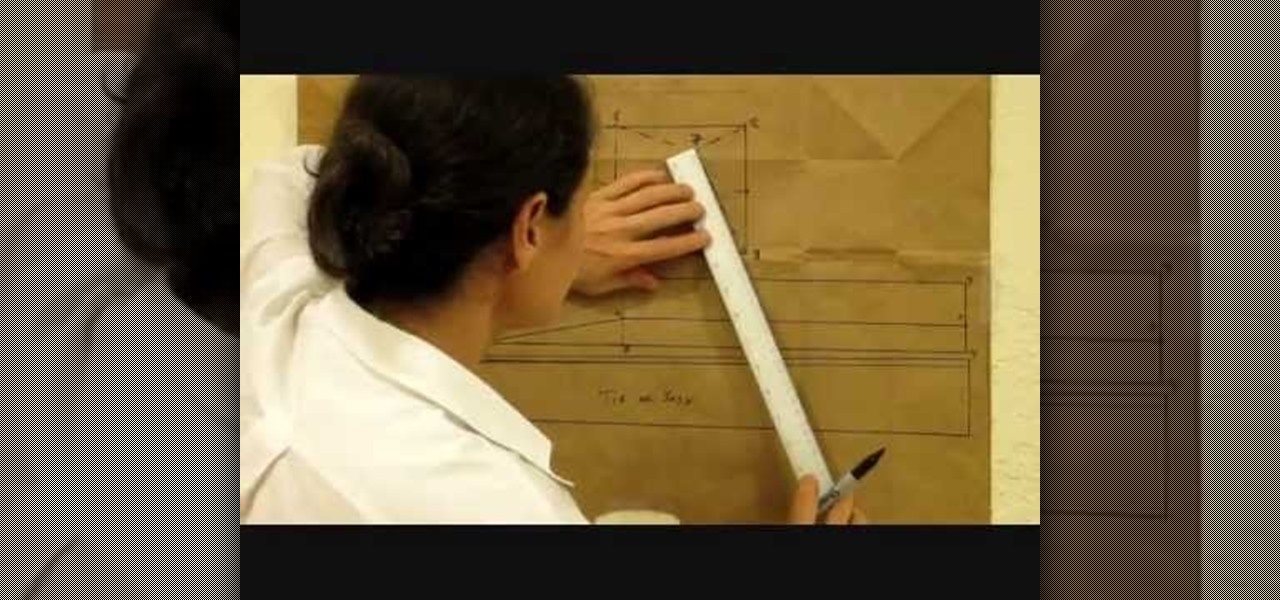
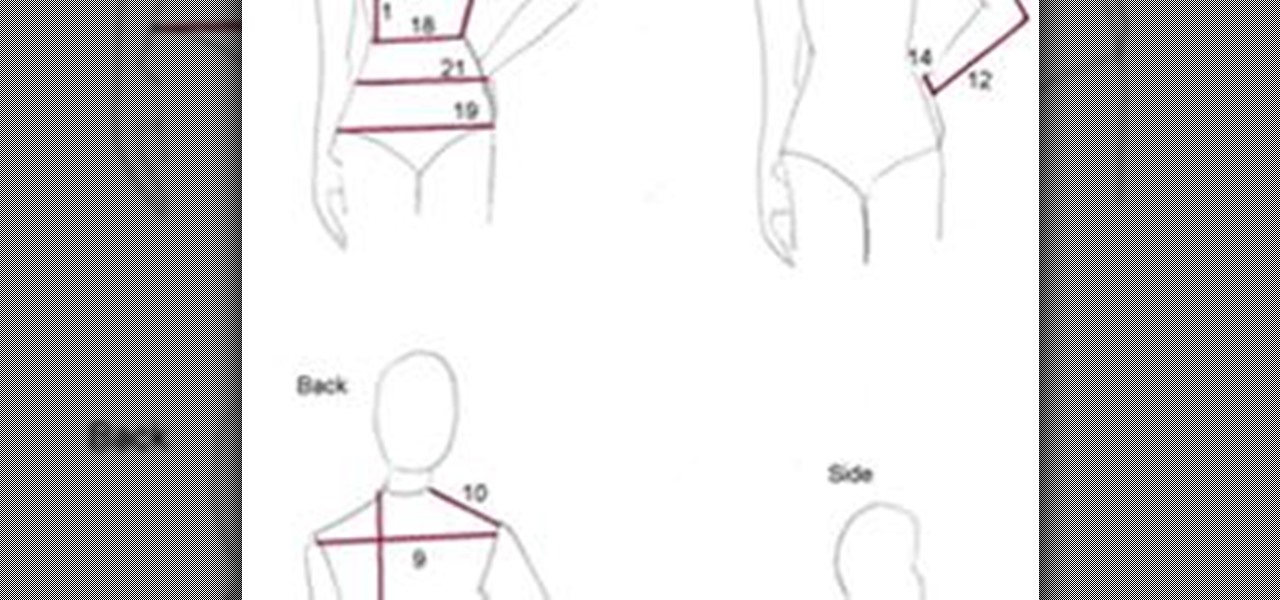
How To: Draft/Make Patterns in Different Sizes (Pattern Making of a Basic Dress with Waistline)
If you want to learn patterns drafting/making in different sizes (EXTRA SMALL, SMALL, MEDIUM, MEDIUM-LARGE, LARGE, EXTRA LARGE), now it becomes easy with these great videos that make patterns drafting easier and clearer.
How To: Draft a Basic Pant Pattern Automated
You have read How to Draft a Basic Pant Pattern. It's a most useful guide, but the image is hard to read and the steps many and complex. That's why I wrote a little software program to do the hard work for you.
How To: Make a Bed for Your Pet Out of an Old Blanket
Hello! Today I would like to write a few lines about making a simple bed for your pet, for example, your cat or a bunny, using your old fabric. All interested can stir up a bit in the closet. I am sure there's an old towel or a blanket just waiting to be reused. Or some old clothes, made out of fleece, etc...
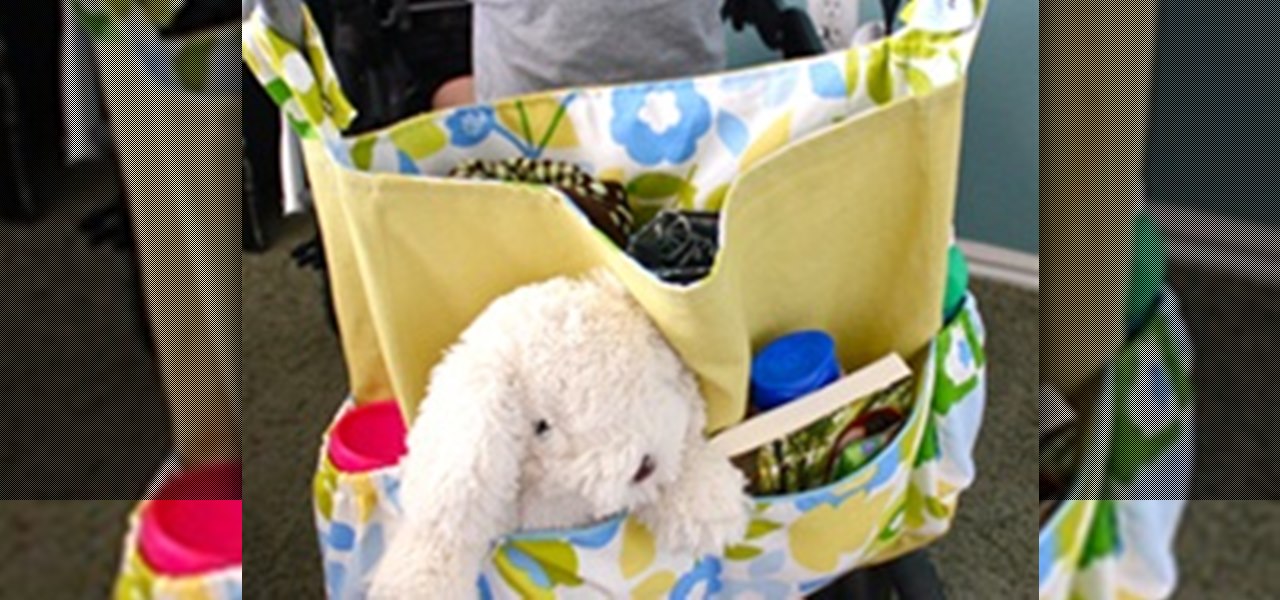
How To: Sew a Stroller Bag
I was tired of digging around in my stroller basket—it was impossible to reach! So I designed this easy-to-sew stroller bag. It snaps onto ANY stroller's handles, and hangs where you can reach it.

How To: Sew a Baby Changing Mat
This all-in-one baby changing mat is cute and convenient! It has two pockets to hold diapers and wipes, and it folds up into a tidy clutch. It features a laminated vinyl surface, so messes are easy to wipe off. It has an elastic closure so you don't have to make a button hole. You can sew it yourself in no time with my easy step-by-step video tutorial.

How To: Design a Basic Straight Skirt Pattern
This is a step-by-step video showing an easy way to design a unique skirt pattern. It's for a basic straight skirt pattern. After you have your pattern finished, you can create any skirt style that you can imagine. Don't waist time. Watch below to start designing your pattern to fit your body perfectly.

How To: Make a Perfect Fitting Pants Pattern for Yourself
Pants are here to stay. Women of all ages love wearing pants. Jeans, trousers, slacks, corduroys… whatever. Everyone wants them to look and fit great, while being comfortable.

How To: Make a Support Halter Top
To make a support halter top shirt, you will need: Pattern for a basic bodice
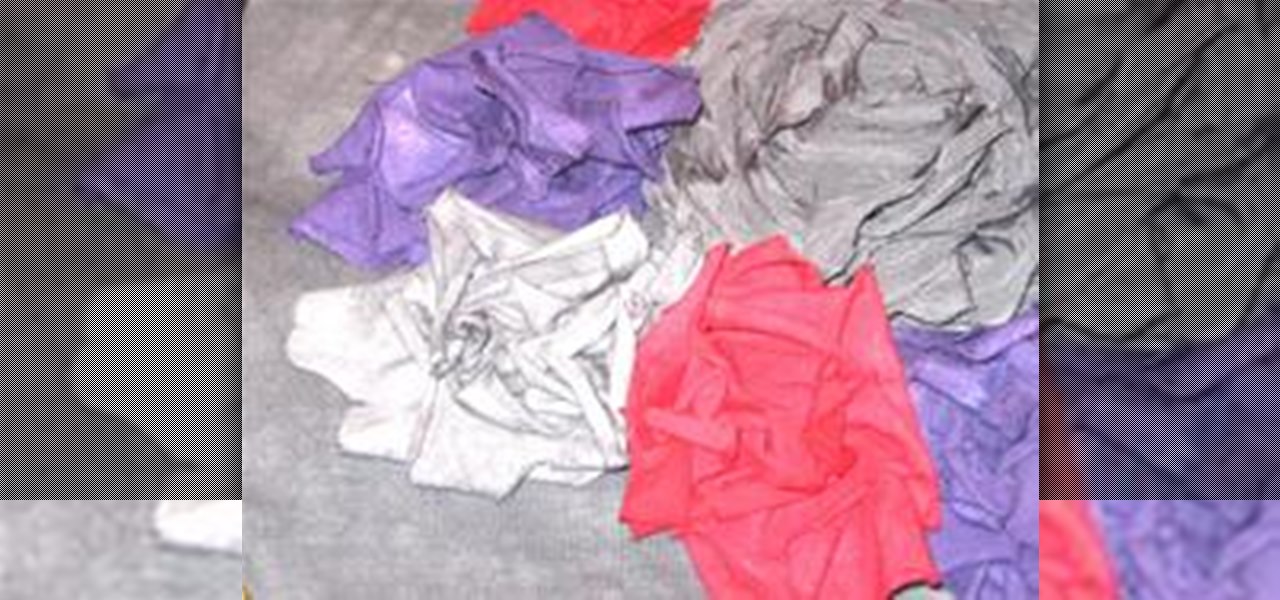
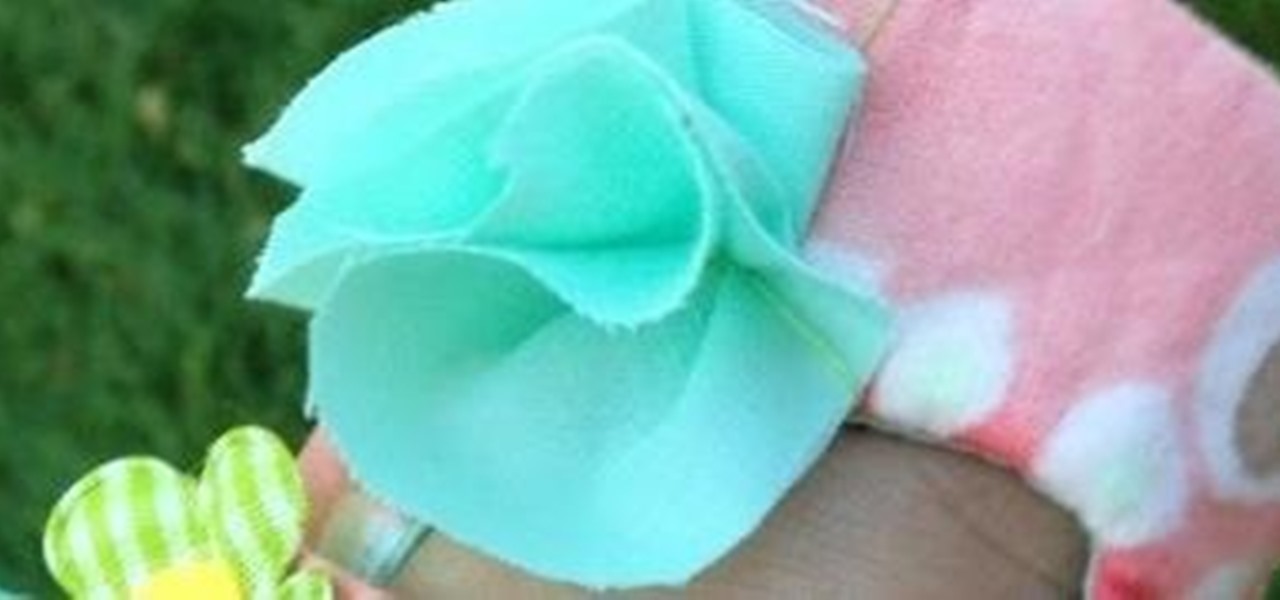
How To: Make Recycled Deconstructed Roses
In this article, you'll learn how to create deconstructed roses in less than five minutes with your leftover fabric scraps. It's a great way to recycle your leftover fabric! Follow the instructions below and watch the videos for a demonstration.

How To: Create a simple off the shoulder top by cutting off a t-shirt collar
Most people think that you have to be a whiz with the needle and thread as well as proficient on the sewing machine in order to make or tailor your own clothing. But the truth is that for easy modifications, like turning an old t-shirt into a modified, chic top, all you need is a pair of scissors and perhaps a stitch or two.

How To: Create a cute off the shoulder sweatshirt by cutting off the collar
Got a bunch of old, chunky sweaters accumulating in your closet? Of course you can donate them to Goodwill, but we're betting that you can get a lot more mileage out of those babies than you think.
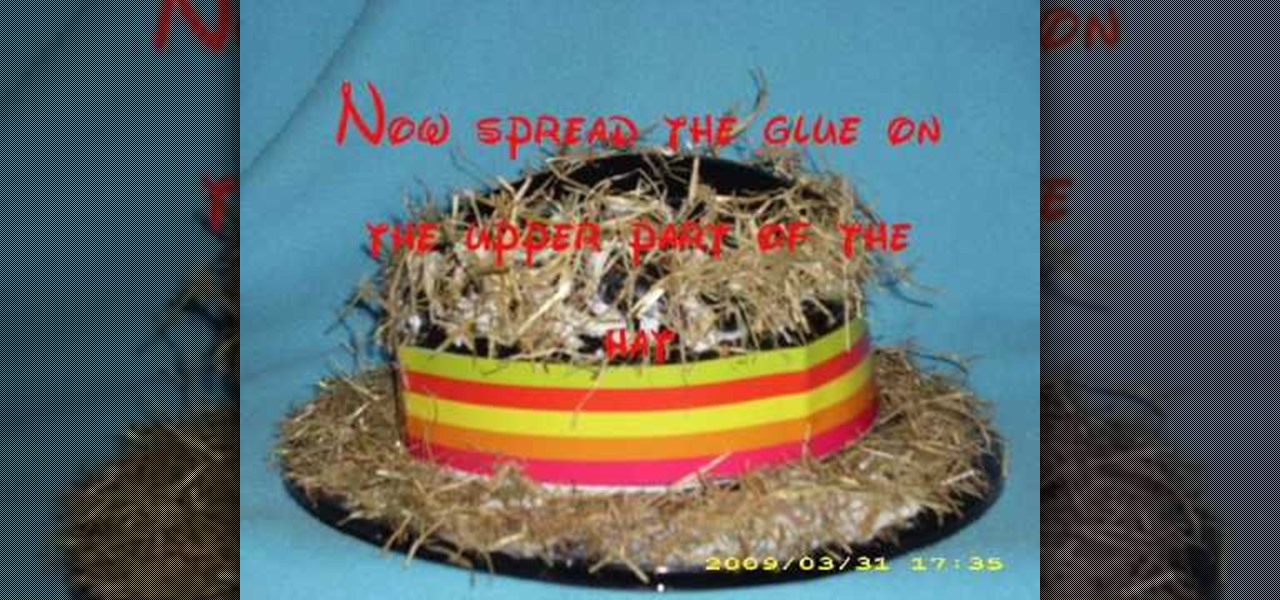
How To: Make an awesome birds nest Easter hat for a boy
Why should women get all the pretty hats at Easter time? You can make a fun and seasonal Easter hat for a boy quite easily! This video shows you how to take a plain hat and turn it into a birds nest hat. You will need: a hat (a plastic party fedora will work just fine), a wide strip of ribbon for the brim, a pair of scissors, some raffia, artificial leaves, a stuffed or toy bird and some craft glue.

How To: Make a mermaid wedding dress out of newspapers
Looking for something unique to do for your wedding? Hate the idea of going from store to store, looking for the perfect bridal dress? What if you could make your own wedding dress... out of newspapers? This tutorial shows you how to make a bridal gown with a mermaid silhouette (fitted bodice and upper skirt, flaring out at the bottom) using nothing more than a few stacks of newspapers and some clear tape. You'll need a few bridesmaids to help you out, but it's guaranteed to fit!
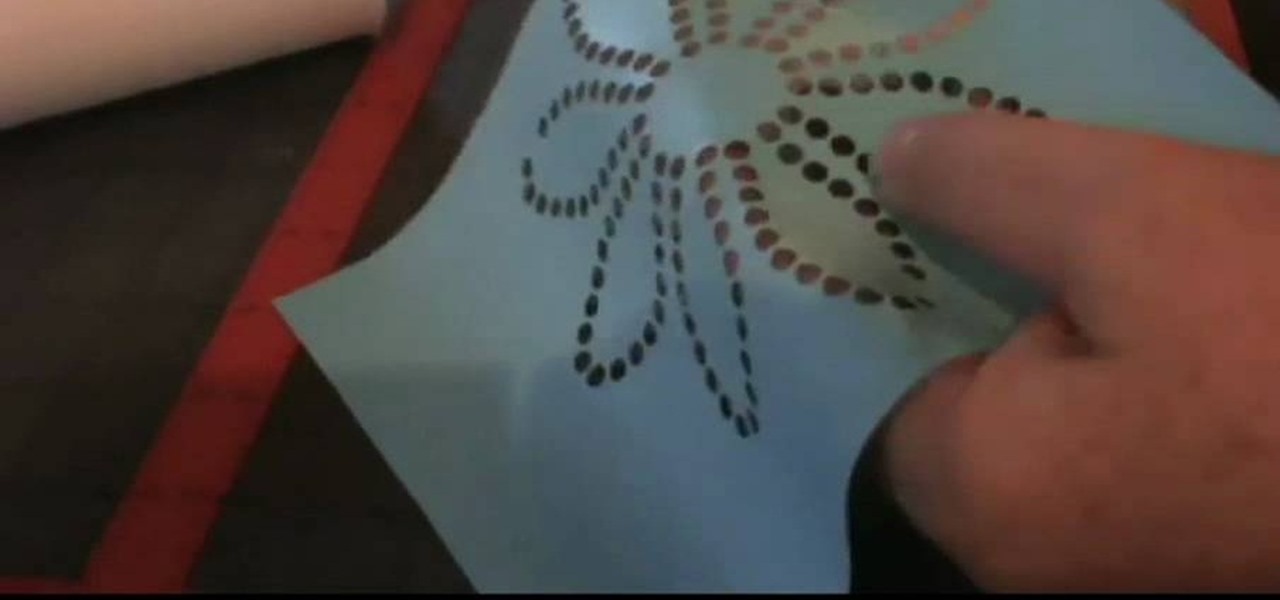
How To: Make a rhinesone stencil template
Like a rhinestone cowboy! Yahoo! Alright, time to get your arts and crafts on and create your very own rhinestone stencil template so you can dazzle and bedazzle your friends and family or whatever craft project you're currently working on. Follow the steps of this nice how-to and learn to make your very own rhinestone stencil template! You're going to need a program like MS Paint, Photoshop or some other image creation or design software to make your stencil.